6 Ways to Delete Temporary Files in Windows 11
As the name suggests, temporary files are not meant to remain forever in your device. Windows and third-party software use them to store data for a limited time. Therefore, you should not worry when programs create short-term files for all kinds of purposes. While these files are meant to be temporary, no program deletes them when they are no longer needed, hence accumulating on your PC’s hard drive.
Below are six ways to delete the temporary files, or else they’ll waste a massive bit of your device’s storage space.
- Automatically Delete Temporary Files with Storage Sense
Windows 11 has a Storage Sense feature that searches and removes temporary app and system files. You simply need to enable the feature on your PC, and you’ll not stress manually deleting such files. The steps below show you how to activate the automatic Storage Sense.
- Hit the search area on your Windows 11 taskbar.
- Type “Storage Sense.”
- Select the “Turn on Storage Sense” option that appears in the search results.
- Toggle the tab beside “Storage Sense” to activate the feature.
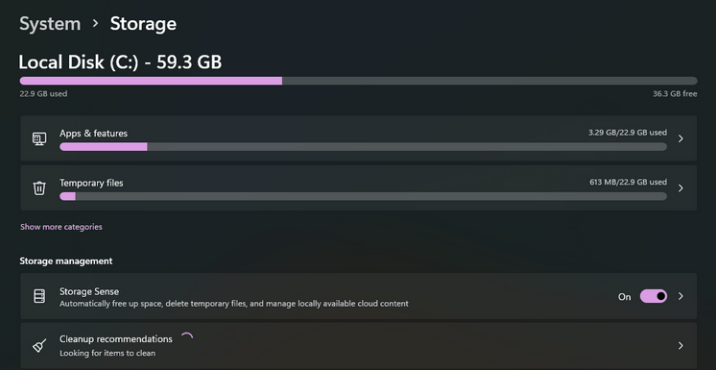
- Click the arrow sign (>) next to the tab to display the settings.
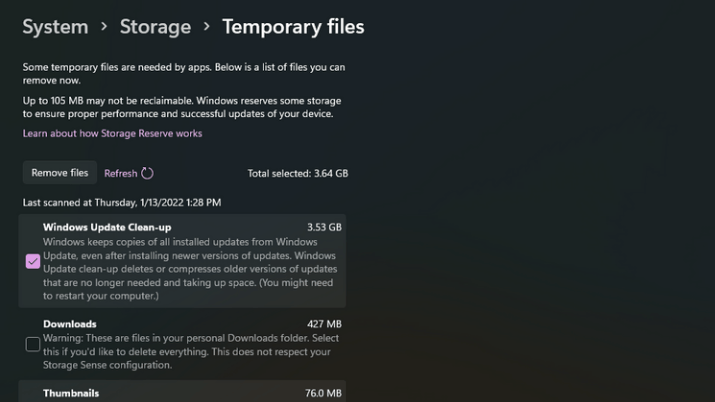
- Check the box beside the “Windows Update Cleanup” option.
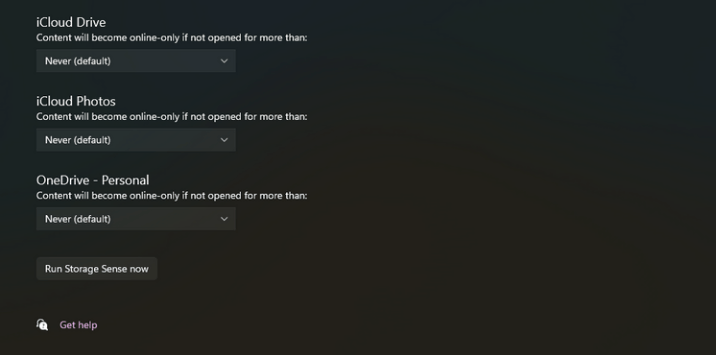
- Enable the “Automatic User Cleanup Content” option.
- Click on the “Run Storage Sense” drop-down menu.
This option will let you select an automatic cleanup schedule to delete the files.
- Choose the “Everyday” option to clear the temporary files daily.
- If you want to use Storage Sense to delete the temporary files manually, click the “Run Storage Sense now” button.
- Delete Temporary Files via the Settings App
The Settings app also comes in handy to delete temporary files in your Windows 11. With the cleaner tool, you can choose to delete specific categories of files, thus giving you more control on what to delete and what to leave than Storage Sense. Below are the steps to clean up temporary files through the Settings app.
- Press the “Start” button on the taskbar.
- Click “Settings.”
- Locate the “System” tab and Choose “Storage.”
- Click on “Temporary files” to display the cleaner tool.
To free up the most disk space, you can manually select all the temporary file checkboxes. However, checking the “Windows Update Clean-up” option alone can free up massive space.
- Finally, click the “Remove Files” button.
- Delete Temporary Files via Command Prompt
There are many valuable tools in the Command Prompt interpreter, but you only need to enter a quick command into the prompt window to erase temporary data. Follow the steps below to delete temporary files through the Command Prompt.
- Hit “WIN+S.”
- Type “cmd” in the search text box.
- Right-click “Command Prompt” in the results.
- Click “Run as Administrator.”
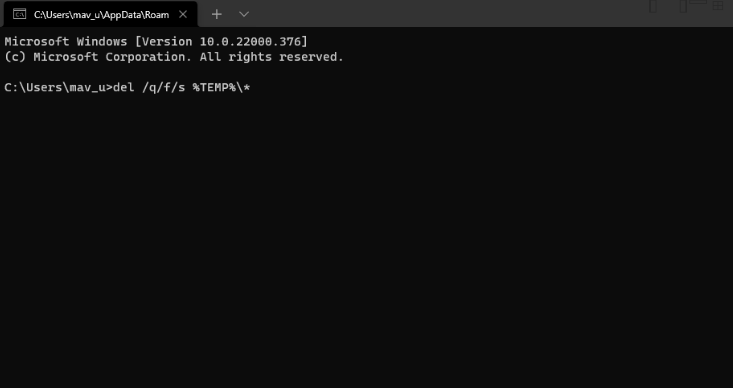
- Type “del /q/f/s %TEMP%\*” and hit “Enter.”
- Delete Temporary Files with Disk Cleanup
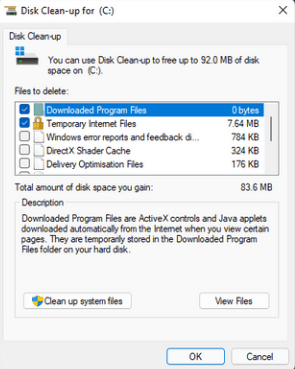
All Windows platforms have a built-in cleanup tool called the Disc Cleanup. The utility helps you get rid of temporary files and much more redundant data. The Disk Cleanup tool comes with check box options for clearing Microsoft Defender options, delivery optimization, log, language resource, and recycle bin. The steps below will guide you to delete temporary files with the Disk Cleanup in Windows 11.
- Open the search box in the taskbar.
- Type “Disk Cleanup.”
- Select “Disk Clean-up” in the results.
- Click the “Clean up system files” button at the bottom.
- Check the boxes beside “Windows Update Clean-up,” “Internet Files,” and “Temporary Files,” or any other option.
- Click “OK” at the bottom.
- Select “Delete Files.”
- Delete Temporary Files with a Batch File
A batch file consists of a collection of different commands. So, you can set up batch files for numerous tasks, including erasing temporary files. Here’s how.
- Open the Start menu.
- Click “All Apps.”
- Choose “Notepad” on the app list.
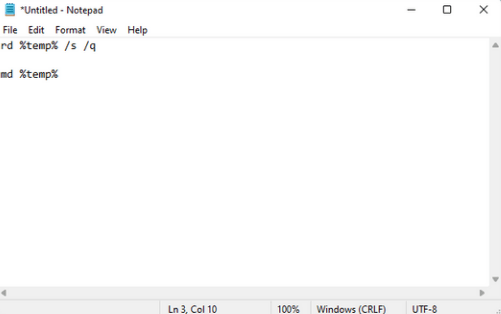
- Copy this code “rd %temp% /s /q
md %temp%.”
- Paste the code into Notepad.
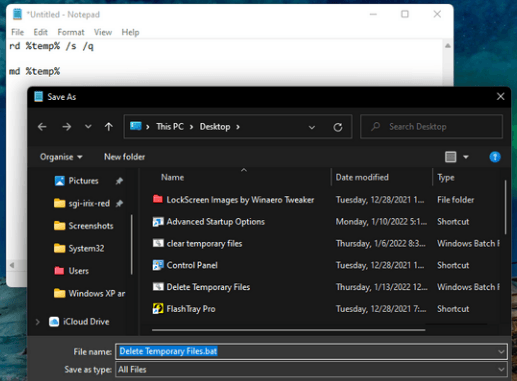
- Select “File.”
- Click “Save As.”
- Choose “All Files.”
- Type “Delete Temporary Data.bat” in the file name box.
- Select “Desktop” as the location.
- Click “Save.”
- Now head to your desktop screen and double-click the “Delete Temporary Data” batch file.
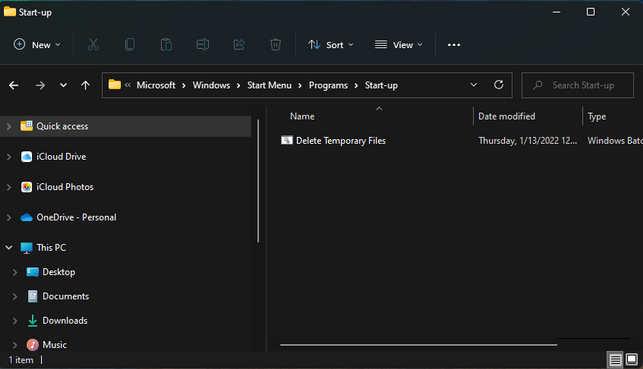
The batch file on your desktop will help you erase temporary files just by clicking on it. If you want the batch file to run automatically, add it to the startup through the following steps.
- Right-click on the batch.
- Select “Copy.”
- Enter WIN+R to launch RUN.
- Type “%appdata%\microsoft\windows\start menu\programs\startup\” in the Open Box.
- Click “OK.”
- Paste the batch file into the startup folder.
- Clear the Temp Folder Manually
Most of the temporary files in your PC are found in the Temp folder. Therefore, you can manually delete data in that folder through File Explorer. Learn the quick method in the steps below.
- Enter “Win+R to launch Run.
- Type “%Temp%.”
- Click “OK.”
- Highlight all the content in the folder.
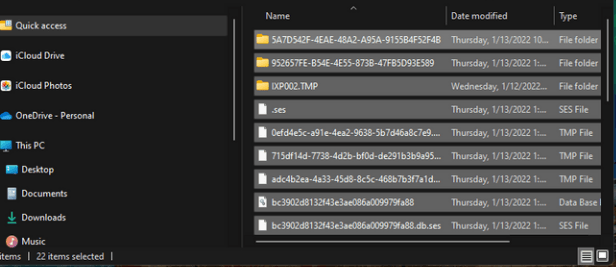
- Click “Delete.”
Note that the files you delete through this method might end up in the Recycle Bin. So, be sure to empty the folder. Now you have won back some hard drive space by deleting pesky temporary files. The different methods discussed above will help you erase temporary data and free up gigabytes of storage space.

