5 Different Ways to Change DNS Server Settings on Windows 11
If your DNS server is not the fastest or most reliable type, you can change it through the five ways discussed below. Before you make any changes, be sure to understand the DNS server’s role in your Windows 11 PC.
Essentially, the Domain Name System (DNS) server transforms all the domains you enter in your browser’s address bar (e.g., Yahoo.com, Google.com, etc.) into IP addresses. In other words, the DNS servers let you open websites in your browser just by typing the domain name.
Notably, the default DNS server running on your Windows 11 PC is provided by your Internet Service Provider (ISP). So, if you prefer to have a different server, you can use the five alternatives offered below to make the necessary changes.
- Use Settings to Change DNS Servers
The “Settings” menu on your PC has many network options to configure. One of these includes changing the DNS server. Here’s how to do it.
- Open the “Start” menu.
- Click “Settings.”
- Open “Network and Internet.”
- Select the “Ethernet” or “Wi-Fi” navigation option.
- Go to “Advanced” network settings.
- Choose the appropriate network adapter.
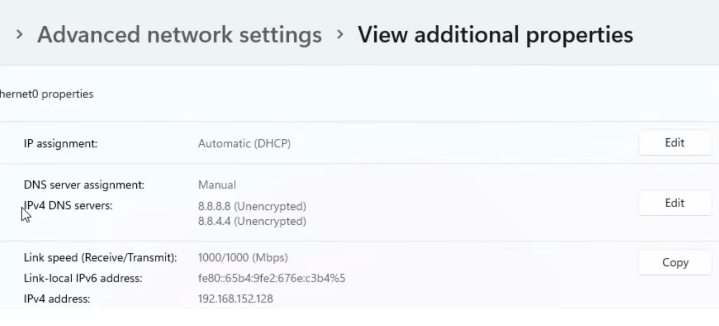
- Click on the “View Additional Properties” option.
- Locate the “DNS Server Assignment.”
- Press the “Edit” button next to it.
- Click the “Manual” option.
- Enable the “IPv4” option.
- Type in new servers in the “Preferred and Alternative DNS” spaces.
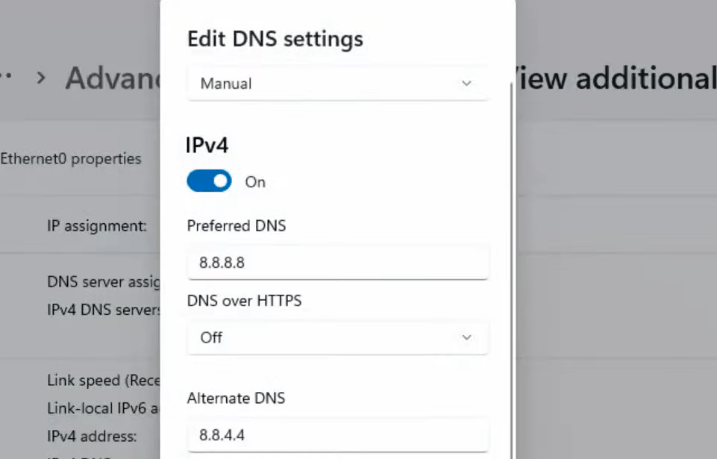
- Hit “Save.”
- Use the Control Panel to Change DNS Server
The Control Panel still has several handy settings despite its gradual sidelining by Microsoft. Some of the settings you should expect on the Control Panel include the adapter settings in the “Network Connections” applet. The applet also lets you change your DNS server as follows.
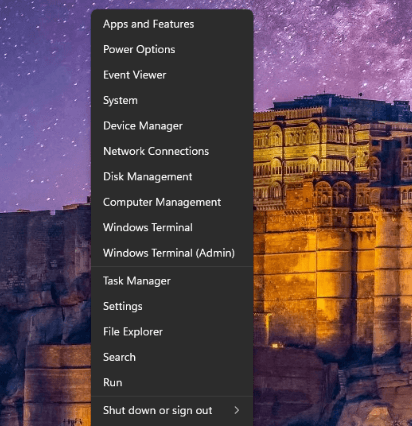
- Open the “Power User” menu by pressing “Win + X.”
- Click “Run.”
- Type “Control Panel.”
- Hit the “OK” button.
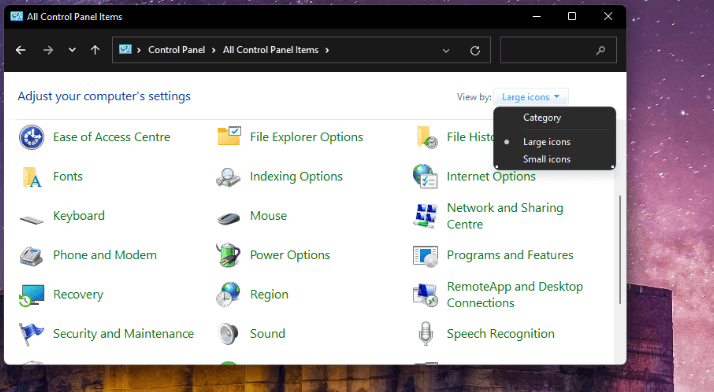
- Locate and select “Network and Sharing Centre.”
- Open the “Change Adapter Settings” option.
- Right-click on your network adapter.
- Go to “Properties.”
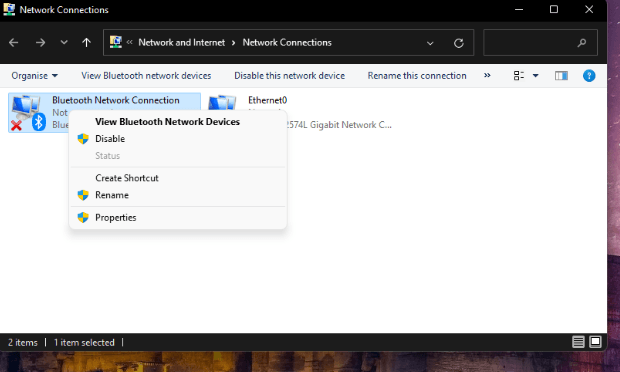
- Open the “Networking” tab.
- Choose “Internet Protocol Version 4 (TCP/IPv4).”
- Click “Properties.”
- Activate “Use the following DNS server addresses.”
- Now enter your alternative DNS addresses in the boxes.
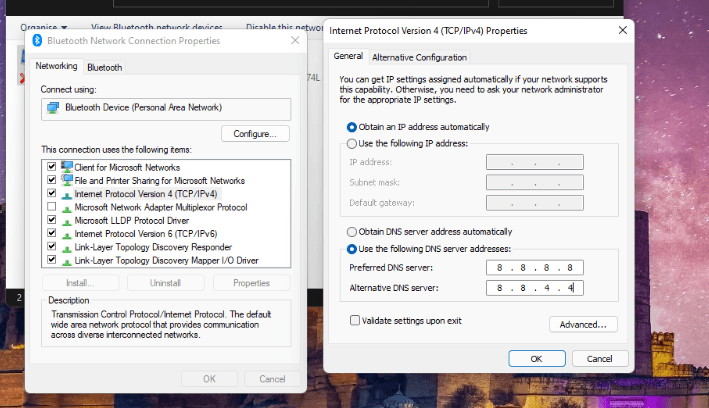
- Press “OK.”
- Use the Command Prompt to Change DNS Servers
The Command prompt lets you change your DNS server in style. Here, you’ll find the Netsch command-line utility that allows you to change the DNS server as follows.
- Press the “Win +S” key to open the search utility.
- Input “cmd” in the search text box to find Command Prompt.
- Select “Run as administrator.”
- Input the command below and press “Enter” to view internet source names.
“netsh interface show interface”
- Take note of the network in the interface.
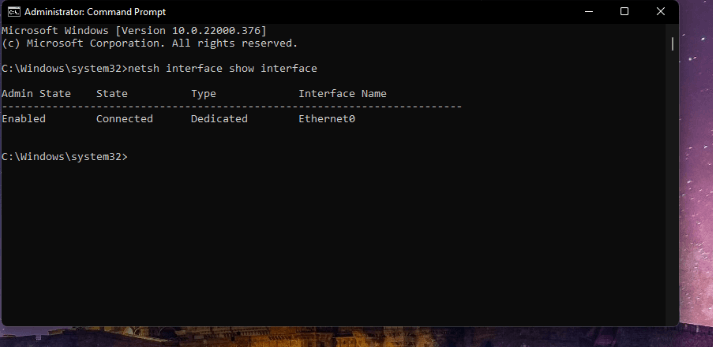
- Then enter the netsch command below.
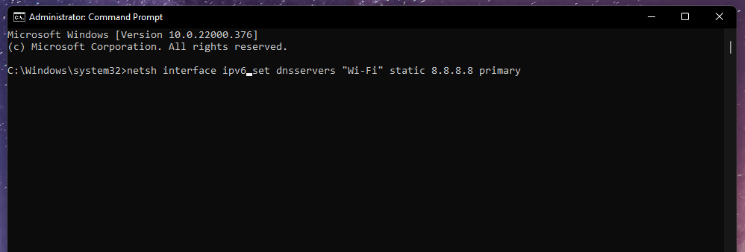
“netsh interface ipv4 set dnsservers “Interface Name” static preferred-DNS-address primary”
- Press “Return.”
- Enter the command below to specify the alternative server address.
“netsh interface ipv4 add dnsservers “Interface Name” alternate-DNS-address index=2″
First, you must edit the Interface name, Preferred, and alternative-DNS-address details in the commands and input the actual address and interface details. If you want to utilize IPv6, you must replace the IPv4 in those commands with ipv6.
Use PowerShell to Change DNS Servers
Windows PowerShell works like the Command Prompt, but it uses different commands. Here are the steps to change the DNS server.
- Open Windows 11’s search box.
- Type “PowerShell” in the search box.
- Select the “Run as administrator” option.
- Enter the command below.
“Get-DnsClientServerAddress”
- Press “Enter.”
- Note down the InterfaceAlias for your Ethernet or Wi-Fi connection.
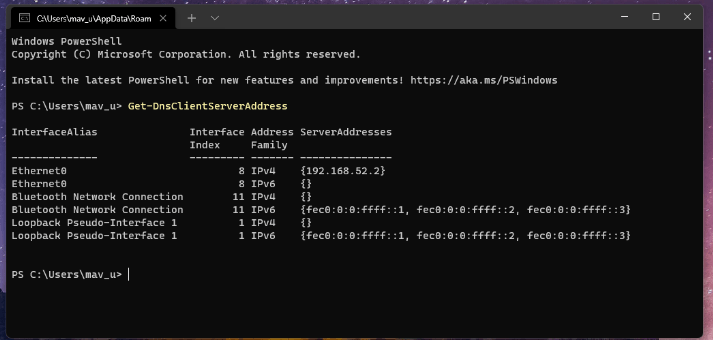
- Input the command below to change the DNS server.
“Set-DNSClientServerAddress “InterfaceAlias” –ServerAddresses (“preferred-DNS-address”, “alternate-DNS-address”)”
- Hit “Enter.”
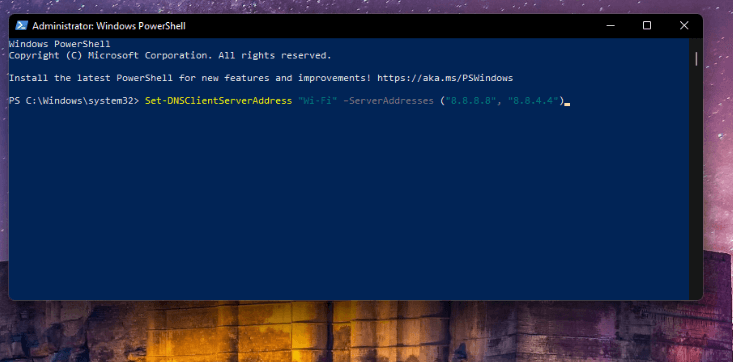
Remember that you’ll have to adjust the InterfaceAlias and the preferred and alternat-DNS-address details in the above command to change the server. This should be replaced with actual details. Below is an example of a Wi-Fi Google DNS command.
“Set-DNSClientServerAddress “Wi-Fi” –ServerAddresses (“8.8.8.8”, “8.8.4.4”)”
- Change DNS Servers With DNS Jumper
DNS Jumper is one of several third-party software that changes DNS server settings. You can utilize the DNS Jumper portable utility freely on any Windows platform. Besides, Jumper comes with 36 different servers for you to choose from. In other words, you don’t need to find the correct addresses to make the necessary server changes.
Follow the steps below.
- Go to the DNS Jumper webpage.
- Scroll to the bottom of the page and click “Download.”
- Press “Win + E” to open File Explorer.
- Locate and open the folder with the DNS Jumper ZIP.
- Click on the “Extract All” option.
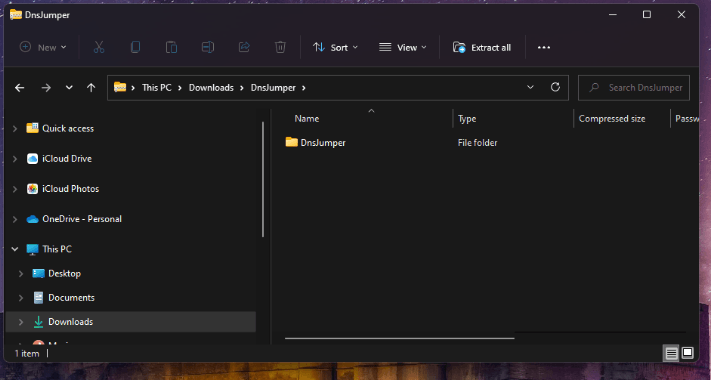
- Alternatively, you can click the “Browse” button to choose a different extraction path.
- Once the “Extract Compressed” window opens, click on the “Show extracted files when complete” option.
- Click “Extract” to access the extracted folder.
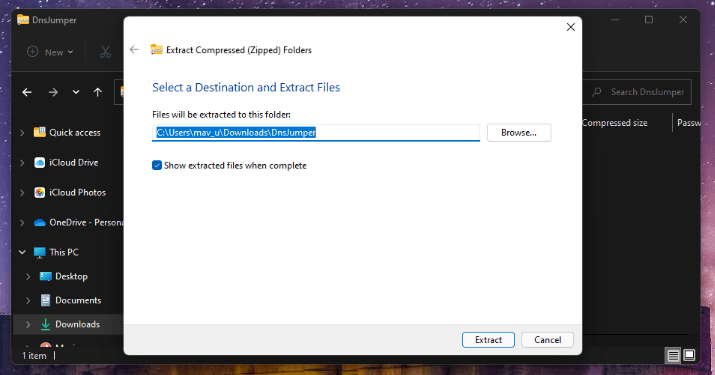
- Locate the folder named “DnsJumper” and double-click to open.
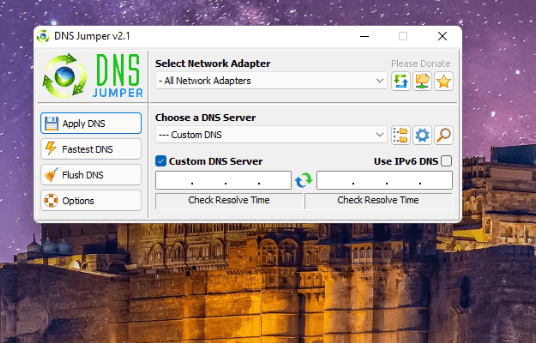
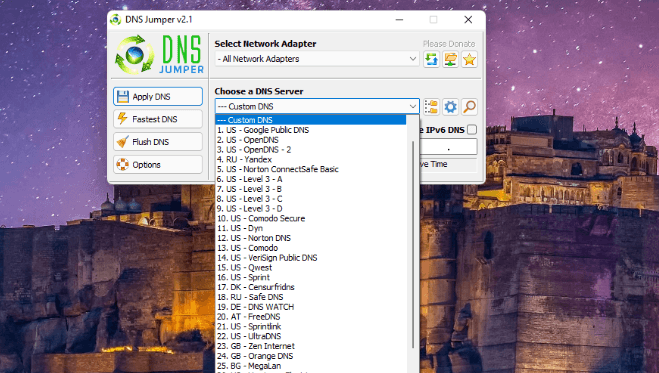
- Click on the drop-down menu beside the “Choose Default DNS Server” option.
- Choose your preferred server option from the prompt menu.
(IMAGE 14)
- If you want to manually enter primary and alternative addresses in the boxes, click the “Custom DNS Server” checkbox.
- Hit the “Apply DNS” button to implement changes.
DNS Server Addresses
If you don’t want to involve third parties such as DNS Jumper in your server settings, you must find and enter addresses manually. Popular alternatives include OpenDNS, CleanBrowsing, Quad 9, Cloudflare, and Google. Below, we’ve listed the IPv4 addresses for those alternatives to save you some searching.
- OpenDNS: 208.67.222.222 (primary) 208.67.220.220 (alternative)
- CleanBrowsing: 185.228.168.9 (primary) 185.228.169.9 (alternative)
- Google: 8.8.8.8 (primary) 8.8.4.4 (alternative)
- Quad9: 9.9.9.9 (primary) 149.112.112.112 (alternative)
- Cloudflare: 1.1.1.1 (primary) 1.0.0.1 (alternative)
Try Out Alternative DNS Server Generally, the methods discussed here make it easy to change DNS servers in Windows 11. The DNS Jumper is probably the easiest and quickest method. Besides, the likes of Cloudflare, OpenDNS, and Google Public DNS could be more reliable and faster than your current server.

