3 Ways to Recover Data from a Mac That Won’t Boot
Failing to back up your important data in your Mac could be risky. The situation could be disastrous if the Mac fails to boot. Perhaps you have valuable data, half-written manuscript, or irreplaceable photos trapped in your Mac.
Remove the Hard Drive
It would be difficult to retrieve data if the Mac fails to power on. However, if you’re still determined to get the data from the device, even if it fails to power on, you can remove the internal drive and place it in a different enclosure. With an external hard disk enclosure, you can connect the internal drives to another computer through a similar connection type or USB.
Note that extracting Mac’s hard drive requires technical expertise and some tools. So, you better seek expert advice before you think of dismembering your Mac. In the same way, you can find affordable data recovery services from a good computer repair technician.
However, you can use the methods below to retrieve critical files if your Mac powers on but fails to boot to the desktop. Some of the methods provided below will require a spare external drive or Mac to hand.
Method 1: Use Target Disk or Share Disk Mode to Copy Files
Using Apple’s Target Disk, or Share Disk mode for Intel Macs, is the easiest way to recover data from a Mac that won’t boot. You can copy and access files through any of the two modes by connecting two Macs with a cable and treating the faulty one like an external hard drive.
Note that you need two Macs and an appropriate cable for Share Disk to function. However, if the faulty Mac is an Apple Silicon device, you’ll need to use a USB, USB-C, or Thunderbolt cable along with the Share Disk option. On the other hand, if the Mac is an Intel device, you can use any of the mentioned cables, but this time with the Target Disk Mode. If the Mac that won’t boot is running macOS Big Sur or a later version, the Target Disk Mode will work fine with only a Thunderbolt connection.
Activate Share Disk Mode
Follow the steps below to enable Share Disk on the Mac that won’t boot.
- Use the appropriate cable to connect both devices.
- Ensure that the faulty Mac is shut down.
- Press and hold the “Power” button on the Mac that won’t boot until you see the boot manager.
- Select “Options.”
- Hit “Continue.”
At this point, you may be required to enter your admin password.
- Once you gain access, Click “Utilities.”
- Select “Share Disk.”
- Choose the disk that you want to share.
- Click “Start Sharing.”
- Now boot the other Mac up normally.
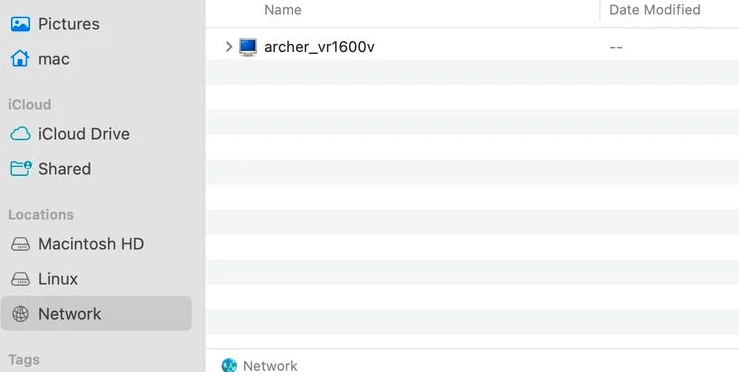
- Go to “Finder” and access the shared drive as a network.
You should see “Network” in the sidebar.

- Double-click it.
- Choose “Connect As.”
- Select “Guest” from the prompt.
- Click “Connect.”
Now, the files should start copying across from the shared drive.
Activate Target Disk Mode
If the faulty Mac is an Intel, follow the steps below to access files.
- Connect the Mac to another through the appropriate cable.
- Ensure the faulty Mac is shut down.
- Turn the functional Mac on.
- Hold the “T” key until you see a disk icon on the screen.
- Now check the other Mac’s Finder sidebar or the desktop section to access the shared drive. Here, you can transfer any essential items to the working Mac by copy-pasting or dragging.
Method 2: Copy Files Through Terminal
If you’re comfortable using Terminal, you can enter commands in the macOS Recovery mode to transfer files to another hard drive. Here’s how.
- Connect the external drive to the Mac that won’t boot.
- Boot the macOS recovery appropriate with your Mac model.
- Enter the password when prompted.
- Launch “Disk Utility.”
- Select “Utilities.”
- Go to “Terminals.”
- Enter this command “cp -R /Volumes/Macintosh\ HD/Users/Bob/Documents /Volumes/External\ Drive/.”
- Hit “Enter.”
- You can also view the contents of any transferred folder by entering this command “ls /Volumes/Macintosh\ HD/Users/Bob/Documents.”
While using Terminal is a complex task, it’s undoubtedly an effective way to familiarize with crucial commands.
Method 3: Install macOS and Copy Files
If you struggle with the methods discussed above or have no access to another Mac, you can copy files by installing the macOS onto an external hard drive. Note that you’ll have to wait longer as the macOS has to download and install. Follow the steps below to copy files through this effective data-recovery option.
- Insert the external drive appropriately.
- Boot to macOS Recovery.
- Once you gain access, launch “Disk Utility.”
- Use the “GUID Partition Map” to erase the external drive.
Be sure to choose an appropriate format such as Mac OS Extended or APFS for macOS 10.12 or earlier.
- Exit “Disk Utility.”
- Select “Reinstall macOS.”
- Follow the prompts and choose your drive as the destination.
Allow the installation process some time and set the macOS up to copy files from the Mac. If the internal drive does not appear, you may need to mount and unlock it through Disk Utility automatically.
macOS Backup Options It’s advisable always to back up your data to avoid loss when the device fails to boot. Some of the common backup methods for macOS include iCloud, Time Machine, and Third-party backup software. Whatever method you prefer, ensure the backups are complete, consistent, and easily

