iPhone SIM Card Replacement Tutorial – iPhone/iPad
What do Apple products have in common with most new model cars? Both are designed to encourage owners to seek out paid professionals for most required maintenance needs.
This can make even basic upkeep, such as replacing SIM cards, a major hassle for mobile device DIY’ers.
Even if your service provider provides you with a free replacement SIM card, they may even charge for installing and activating it. AT&T, for instance, is known to charge a $25 fee to set-up a new SIM card in-store.
While the convenience factor may outweigh the expense for some, not everyone has $25 to spare for such a relatively simple task.
If you have nimble fingers, and a little patience, you can save a few bucks by following the tips provided below and doing it yourself using our iPhone SIM card replacement tutorial.
What You’ll Need
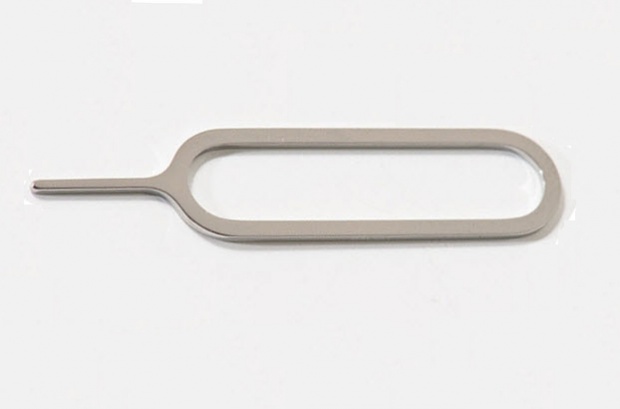
1. SIM eject key tool (Recommended). These keys (pictured above) are usually included with your device, if not, a replacement usually costs $5 or less.
– (Optional): In a pinch, paper clips makes decent substitutes.
2. Ample workspace. A table, preferably one free of clutter and potential errant SIM cards traps, should suffice. It’s not unusual for a SIM card to go flying due to the force required to eject the tray.
(I really can’t emphasize the importance of a proper work area enough. I’ve heard horror stories of SIM cards flying into car air vents, lost for all time.)
Instructions
1. Power off your device. This should go without saying, but make sure your phone is powered down BEFORE you remove the SIM card. Check twice.
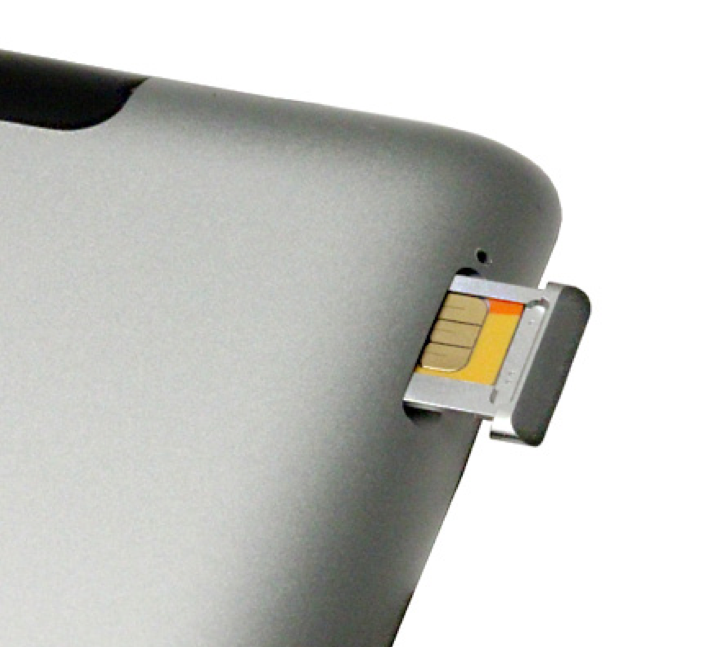
2. Locate the SIM card tray. The slot should look similar in shape to an SD card reader, but smaller, with a tiny pinhole located nearby.
– NOTE: If you’re having difficulty locating the tray on your device, you can use these diagrams from Apple’s website to help.
3. Insert ejecting tool into access point. Remember the aforementioned pinhole we used as a ‘landmark’ in locating the SIM card tray? This is your access point for ejecting the card tray.
4. Apply pressure to tool to eject the tray. Depending on your model, this may be much harder than it sounds, and may require a lot of applied force and better leverage to release.
Don’t hold back, worrying that you might break your device, as though it may look delicate, Apple builds their products to be durable.
– NOTE: The 3rd/4th generation iPads and the iPad 2 require the SIM eject tool to be inserted at a 45 degree angle to release the tray.
5. Remove SIM card from tray. Taking out the old card can be a bit tedious, due to how tiny SIM cards be. The same applies to inserting the replacement card.
– NOTE: iPhone 5 owners should be aware that Apple uses a different, even smaller SIM card in their latest model, called a ‘nano SIM’. Think of this as an added challenge that will build character and pride in your achievement.
6. Activate replacement card. After putting the new SIM card in and closing the tray, you may have to activate it before you can use your device. This is usually as simple as syncing the device with iTunes, similar to the process you used to activate the device initially.
– NOTE: You may be required to contact your carrier’s customer service number in order to complete activation. You’re on your own for that process.
Final Thoughts
Hopefully this guide proves useful in completing what is supposed to be a relatively simple, yet often infuriating, process.
As previously mentioned in the introduction for this tutorial, Apple has a tendency to build their products in a way that almost requires you to pay for any device maintenance you may need.
Trips to the Apple Store and/or mobile carrier, and the small charges that usually accompany them, add up over time. Replacing a SIM card yourself is one minor way you can take control of your investment, while often saving money at the same time.
And that money is better spent on the latest killer appsavailable at the App Store.
– NOTE: The resources utilized in creating this tutorial originated from Knowledge Base articles at support.apple.com, and my own personal experiences dealing with my girlfriend’s iPhone 3 and iPhone 4S (including the $25 fee from AT&T to set up the new card.)
If you run into any trouble not covered by this tutorial, or know of any additional tips or tricks for replacing SIM cards, we at Geek Insider encourage you to share them with us in the Comments section.


